Twilio API keys integration Guide
In order to make and receive phone calls from the DialBunny plugin you need to connect Twilio to the plugin. This guide will show you how to find and integrate your Twilio API keys into the DialBunny plugin.
Requirements
Before starting this setup guide ensure that you have an active Twilio account and already have the DialBunny plugin installed on your WordPress site.
Twilio Account: A Twilio account is required as you will be integrating your Twilio account into the plugin. It is also advised that your Twilio account is already funded.
Plugin Already Installed: You will also need to have already installed and activated the DialBunny plugin onto your WordPress site. It is also recommended that your WordPress site has a proper domain and is secured with https.
Connecting Twilio To DialBunny
This guide provides a step-by-step process for integrating Twilio into the DialBunny plugin, including how to configure all necessary API keys to enable seamless SMS and communication features.
1. DialBunny Settings Page
First navigate to the DialBunny settings page where you will find all of the necessary API keys that the plugin needs to operate.
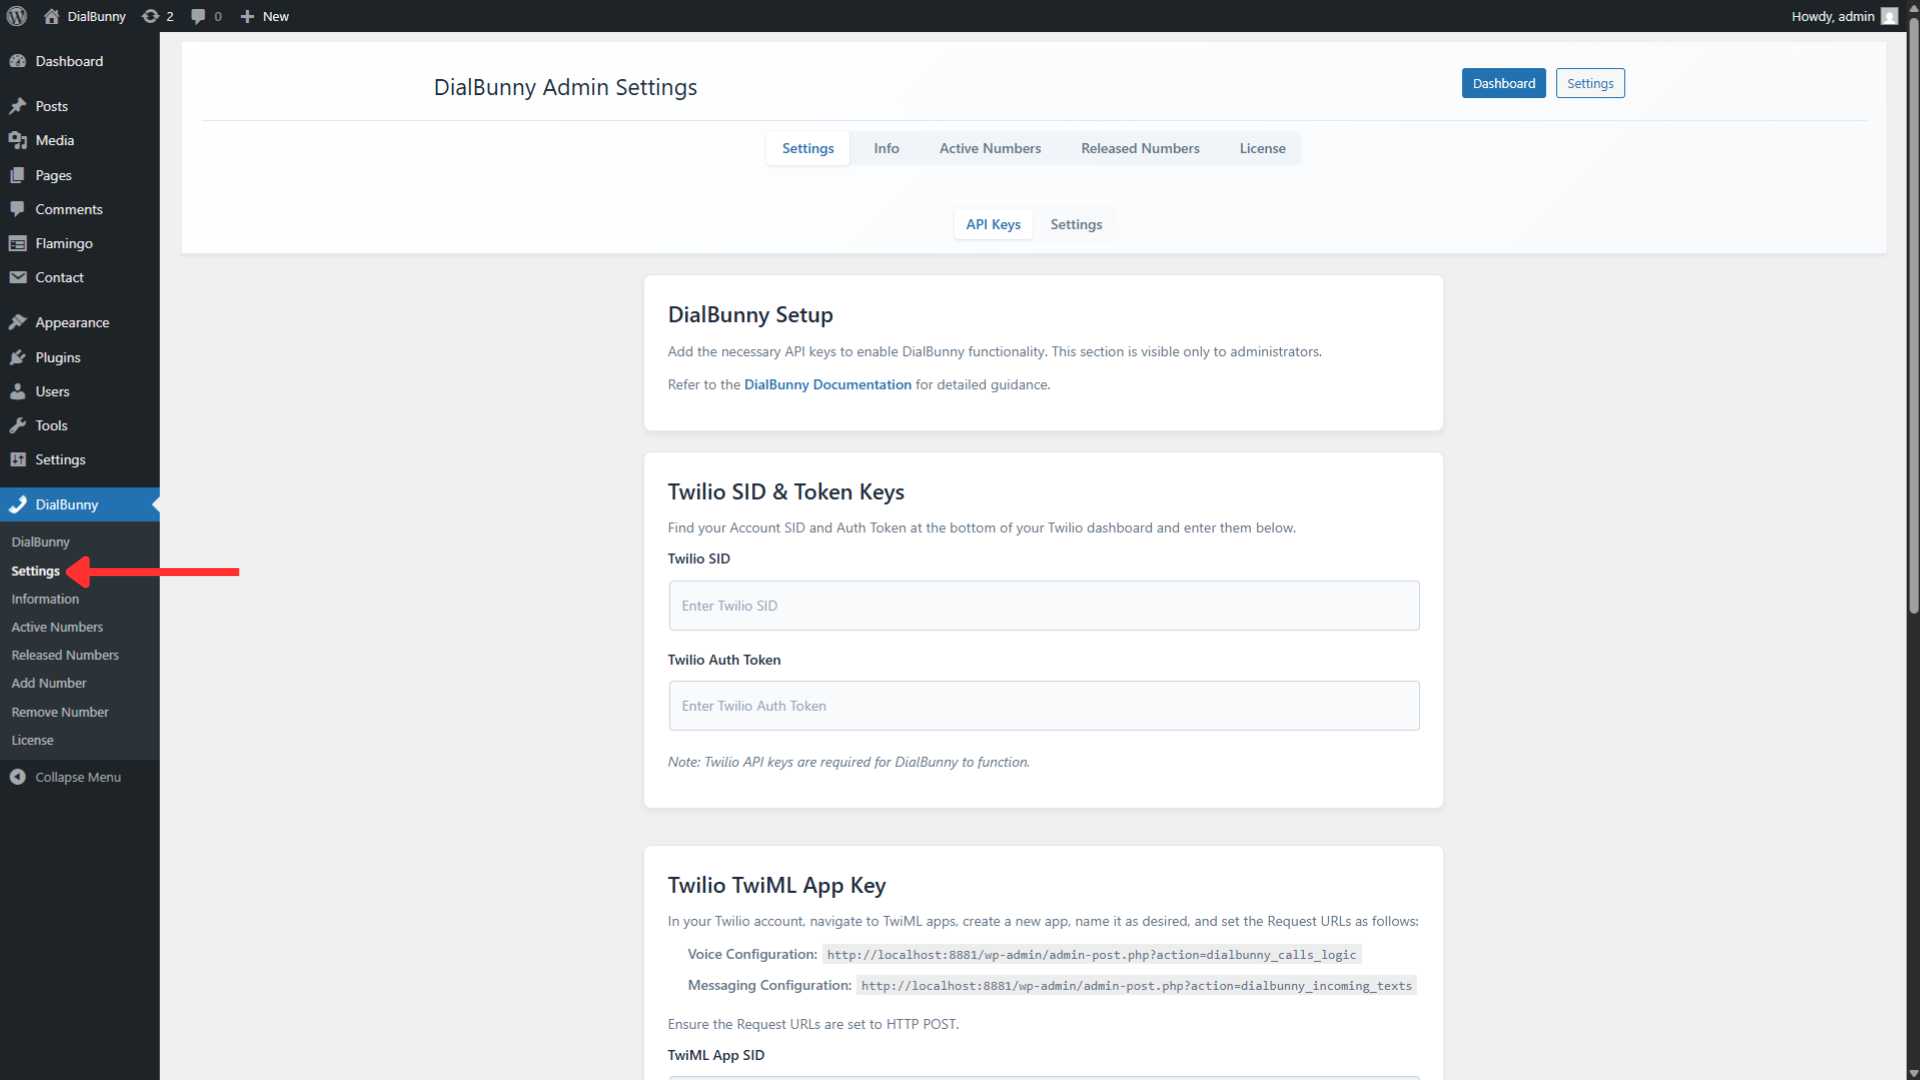
First navigate to the DialBunny settings page where you will find all of the necessary API keys that the plugin needs to operate.
2. Get Account SID & Auth Token
Log into your Twilio account and you should be met with a page that displays these keys at the bottom of the page. Here, you'll see the necessary credentials listed under "Account SID" and "Auth Token". Be sure to handle these credentials with care, as they provide access to your Twilio account and its services.
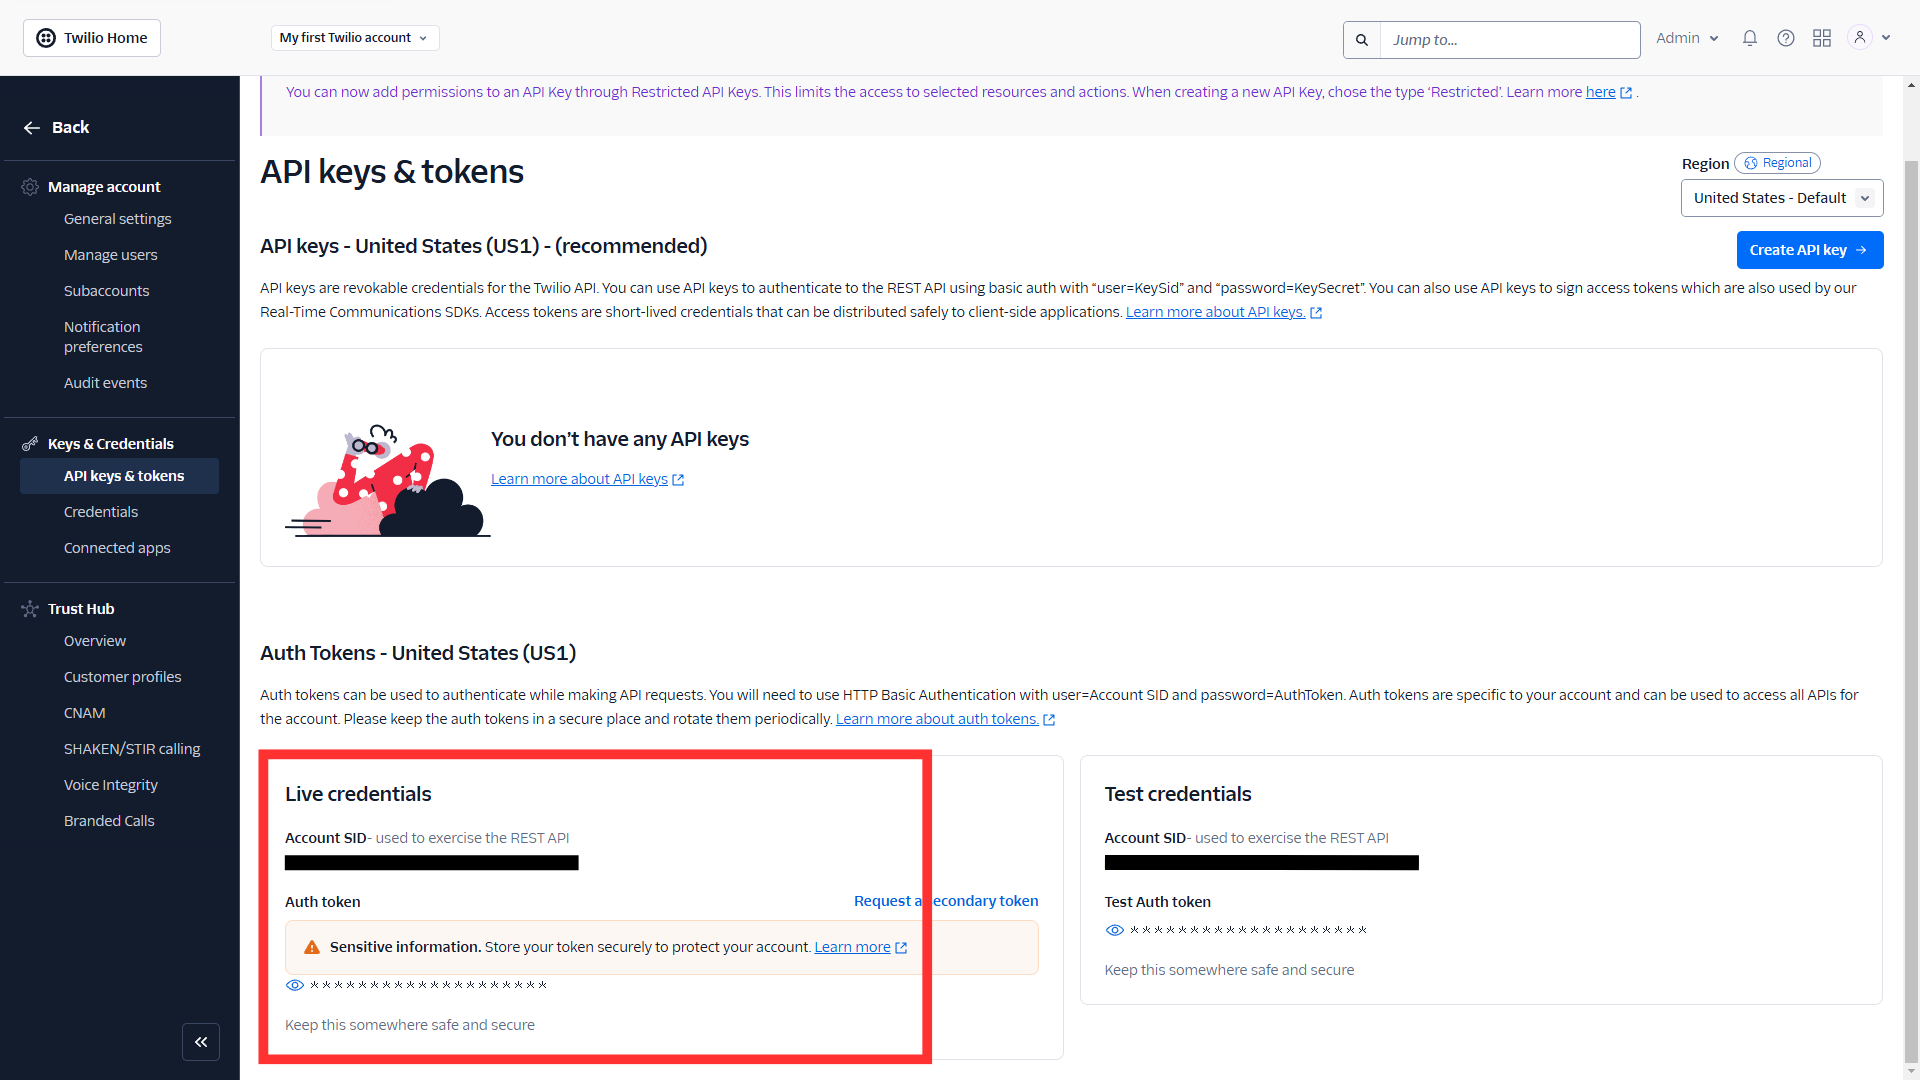
Log into your Twilio account and you should be met with a page that displays these keys at the bottom of the page. Here, you'll see the necessary credentials listed under "Account SID" and "Auth Token". Be sure to handle these credentials with care, as they provide access to your Twilio account and its services.
3. Enter The API Keys Into The Plugin
Within the setup page, you should find designated fields for entering your Twilio credentials. Carefully input your Twilio API SID and Auth Token into the corresponding fields. Double check for any typographical errors to ensure a smooth configuration process. After entering your credentials, make sure to save the changes
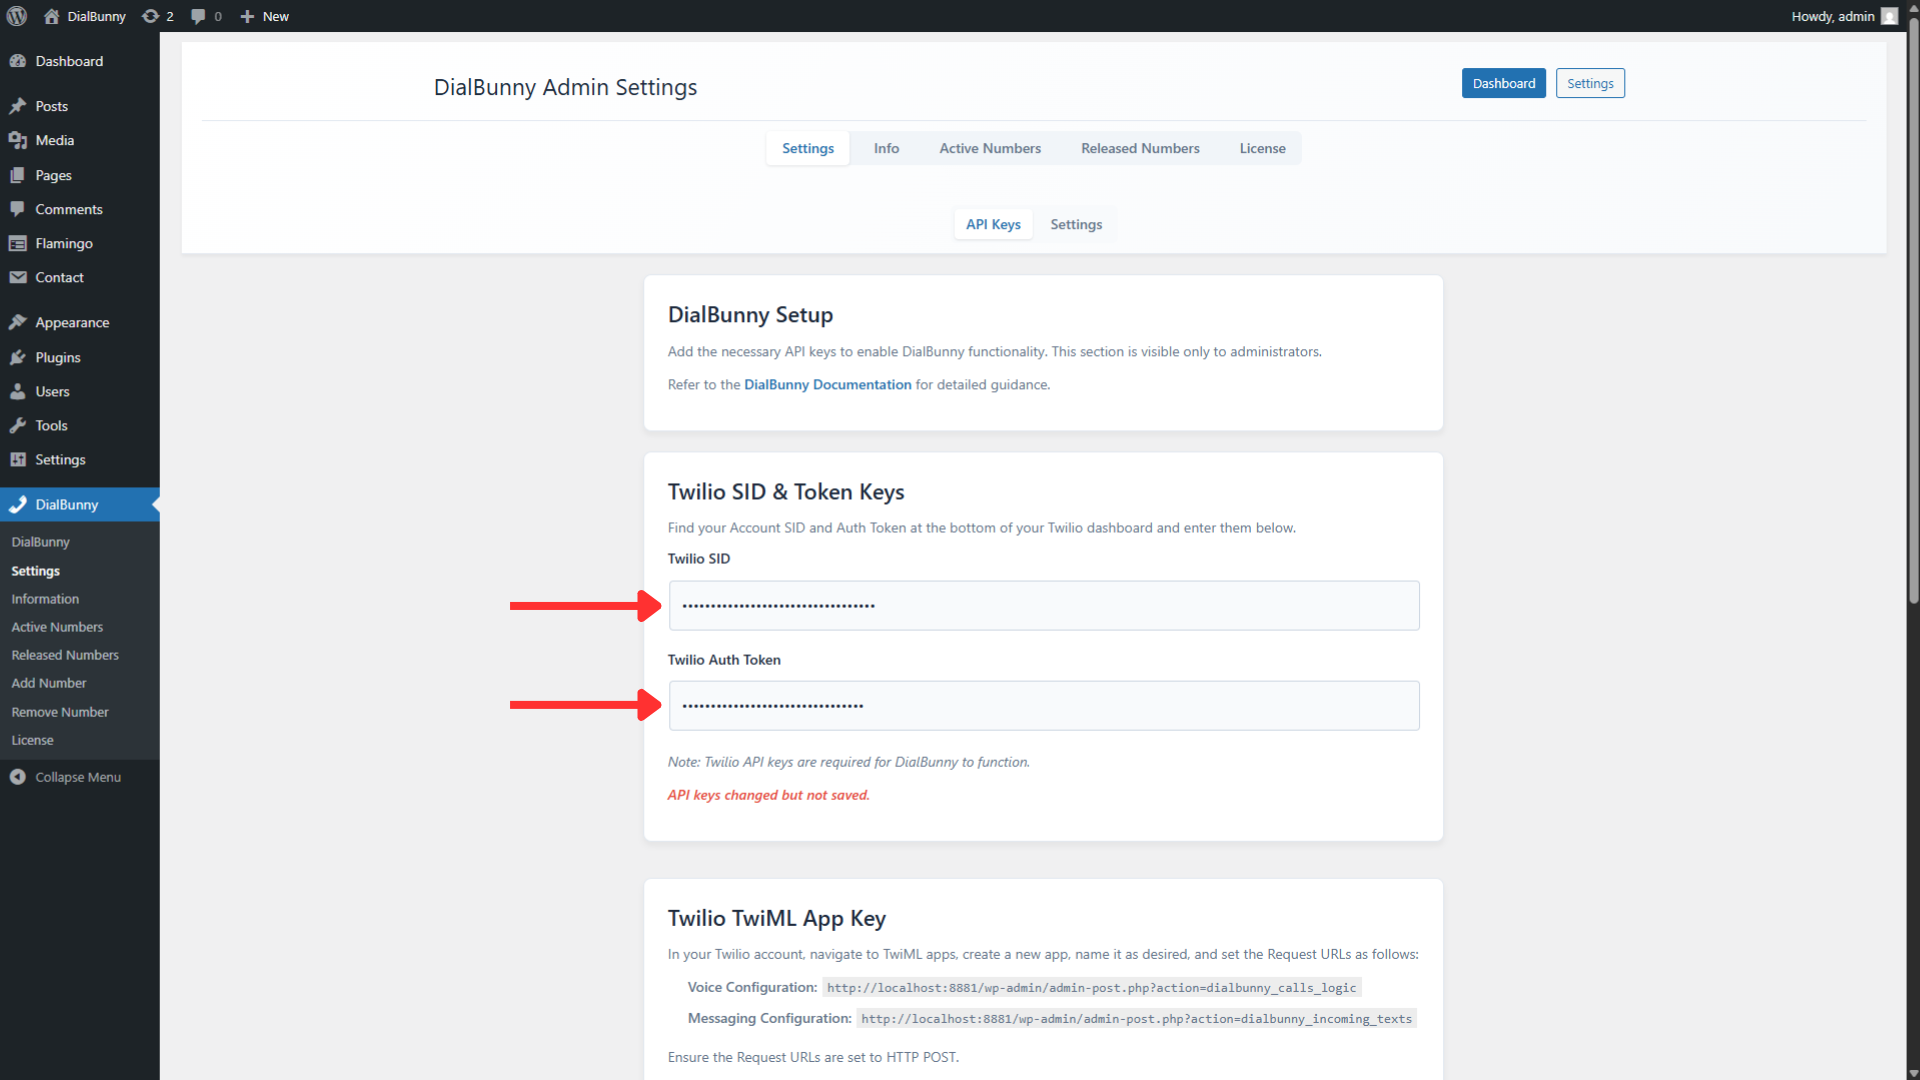
Within the setup page, you should find designated fields for entering your Twilio credentials. Carefully input your Twilio API SID and Auth Token into the corresponding fields. Double check for any typographical errors to ensure a smooth configuration process. After entering your credentials, make sure to save the changes
4. Run The Automatic Setup
After you have saved the two API keys, run the automatic setup to finish the setup process which will automatically fetch the remaining API keys. Once the automatic setup is finished, the Twilio integration is complete.
After you have saved the two API keys, run the automatic setup to finish the setup process which will automatically fetch the remaining API keys. Once the automatic setup is finished, the Twilio integration is complete.
Manually Create TwiML App & Keys & Tokens (Optional)
This section of the guide is dedicated for individuals that don't want to use the automatic setup process.
1. TwiML App
Navigate to TwiML Apps from your Twilio account dashboard and create a TwiML App. The Twiml app will handle the basic functionality of sending and receiving calls and texts.
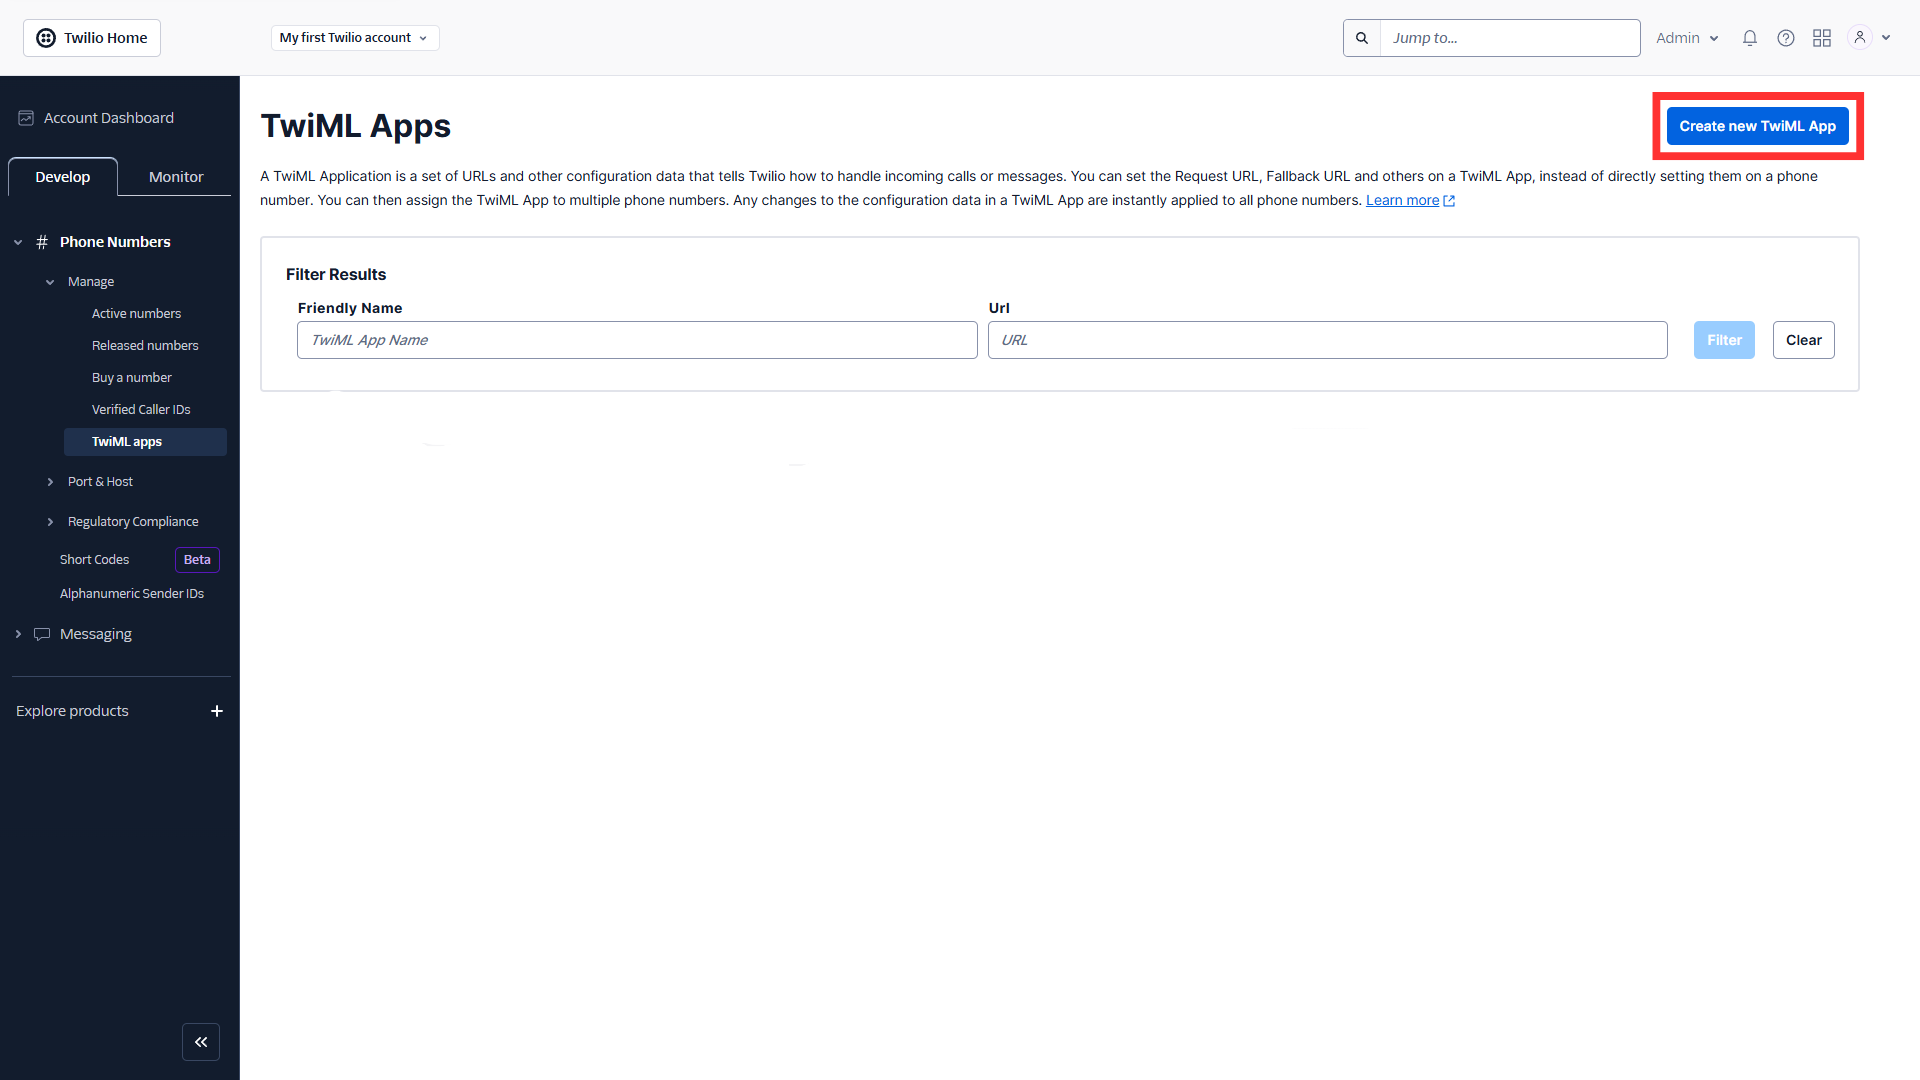
Navigate to TwiML Apps from your Twilio account dashboard and create a TwiML App. The Twiml app will handle the basic functionality of sending and receiving calls and texts.
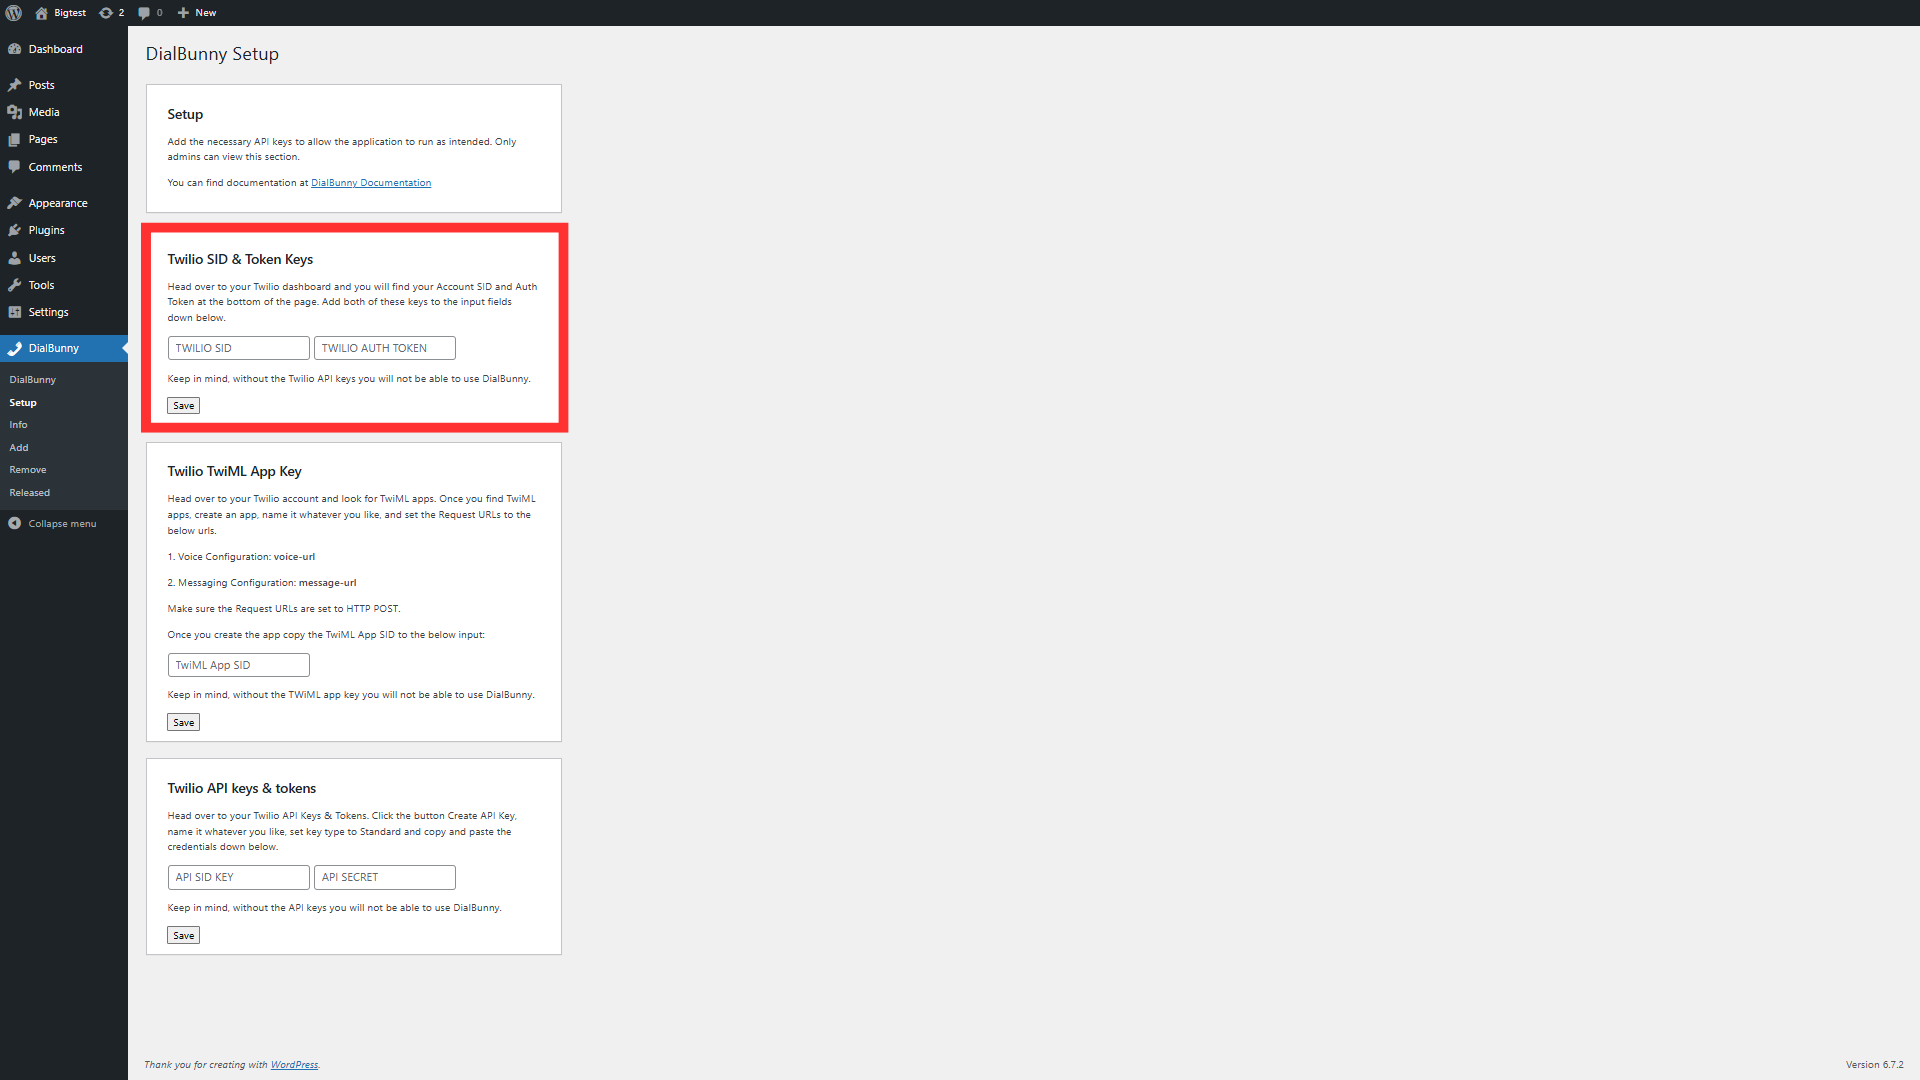
2. Setup TwiML App Then Copy SID Key
Name the app whatever you like and then insert your voice configuration and message configuration request URLs. You can find the configuration URLs inside the settings page in the DialBunny plugin. The configuration URLs are unique to every WordPress site. Once you have created the TwiML app, head over to the DialBunny settings page and enter the TwiML App SID key into the correct field.
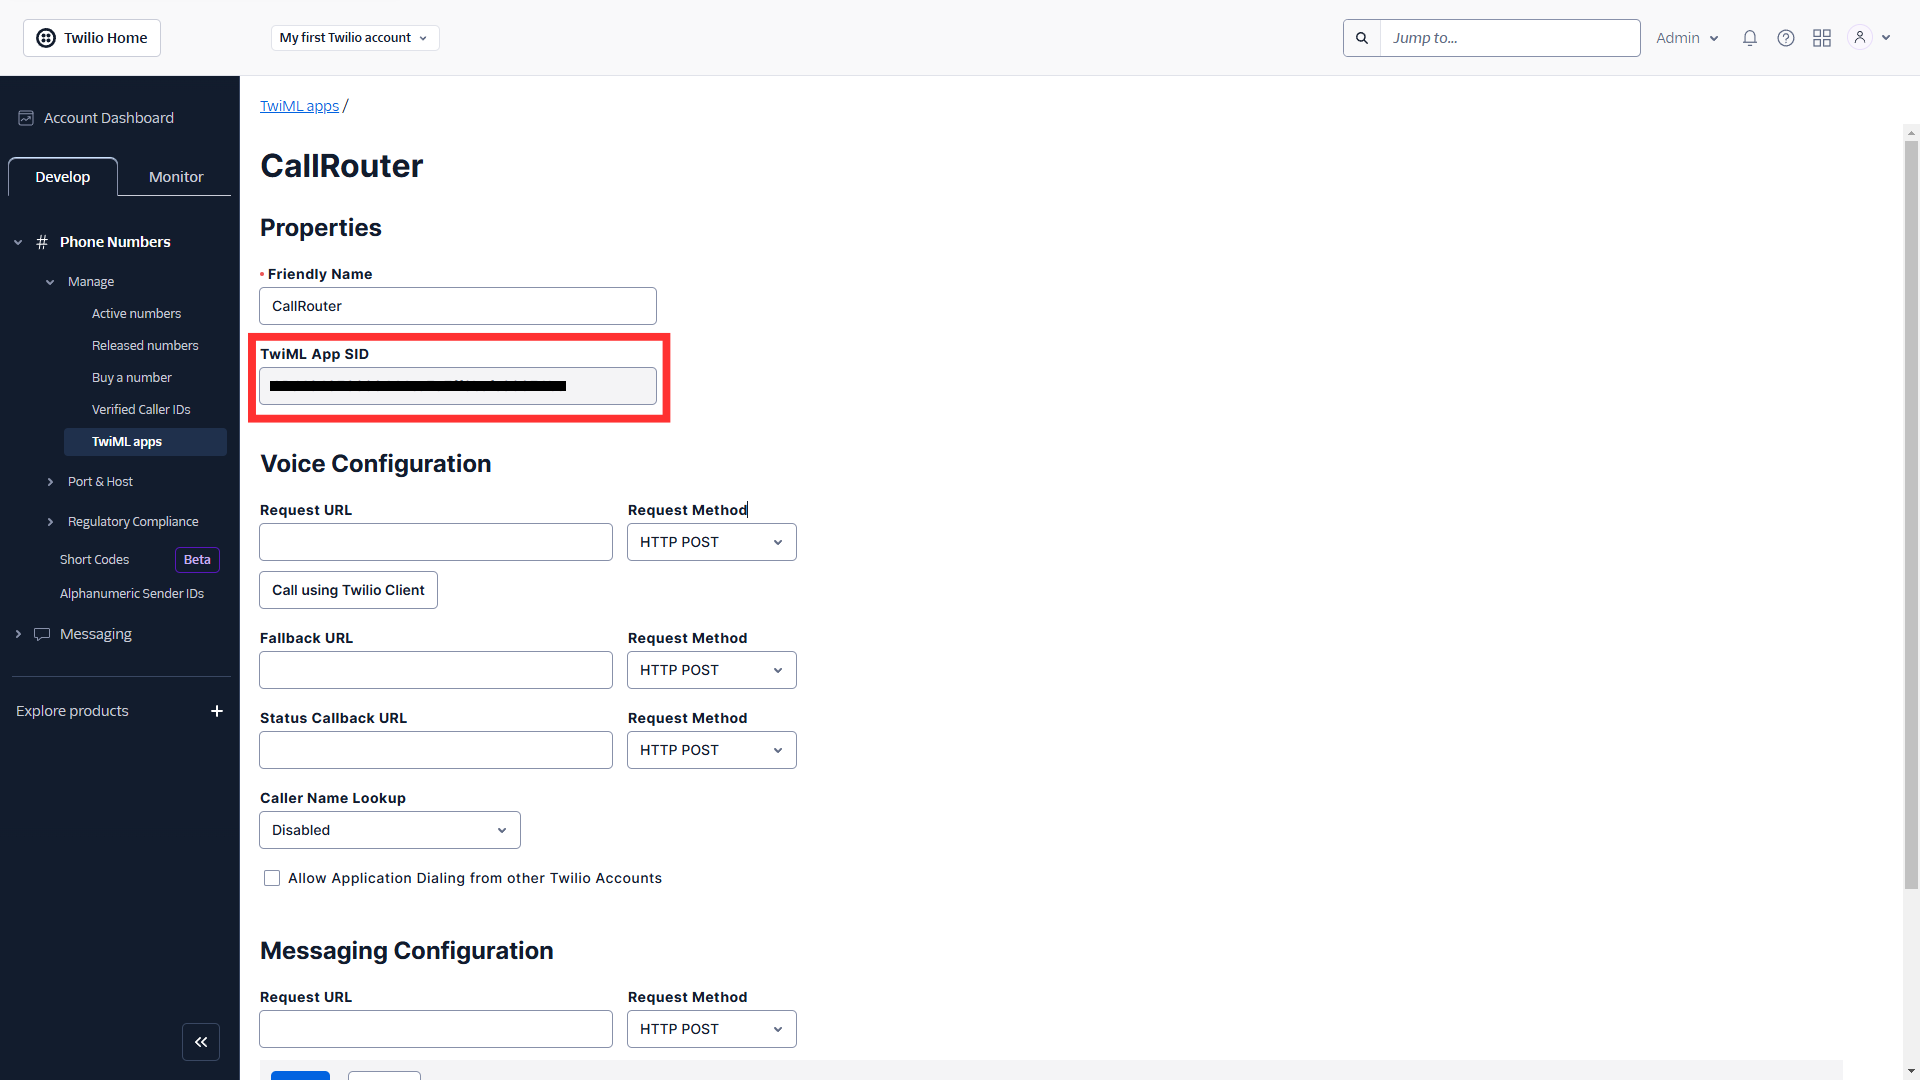
Name the app whatever you like and then insert your voice configuration and message configuration request URLs. You can find the configuration URLs inside the settings page in the DialBunny plugin. The configuration URLs are unique to every WordPress site. Once you have created the TwiML app, head over to the DialBunny settings page and enter the TwiML App SID key into the correct field.
3. Twilio API keys & tokens
Lastly, head over to Twilio API Keys & Tokens from your Twilio account dashboard. Cick on Create API Key to create your credentials.
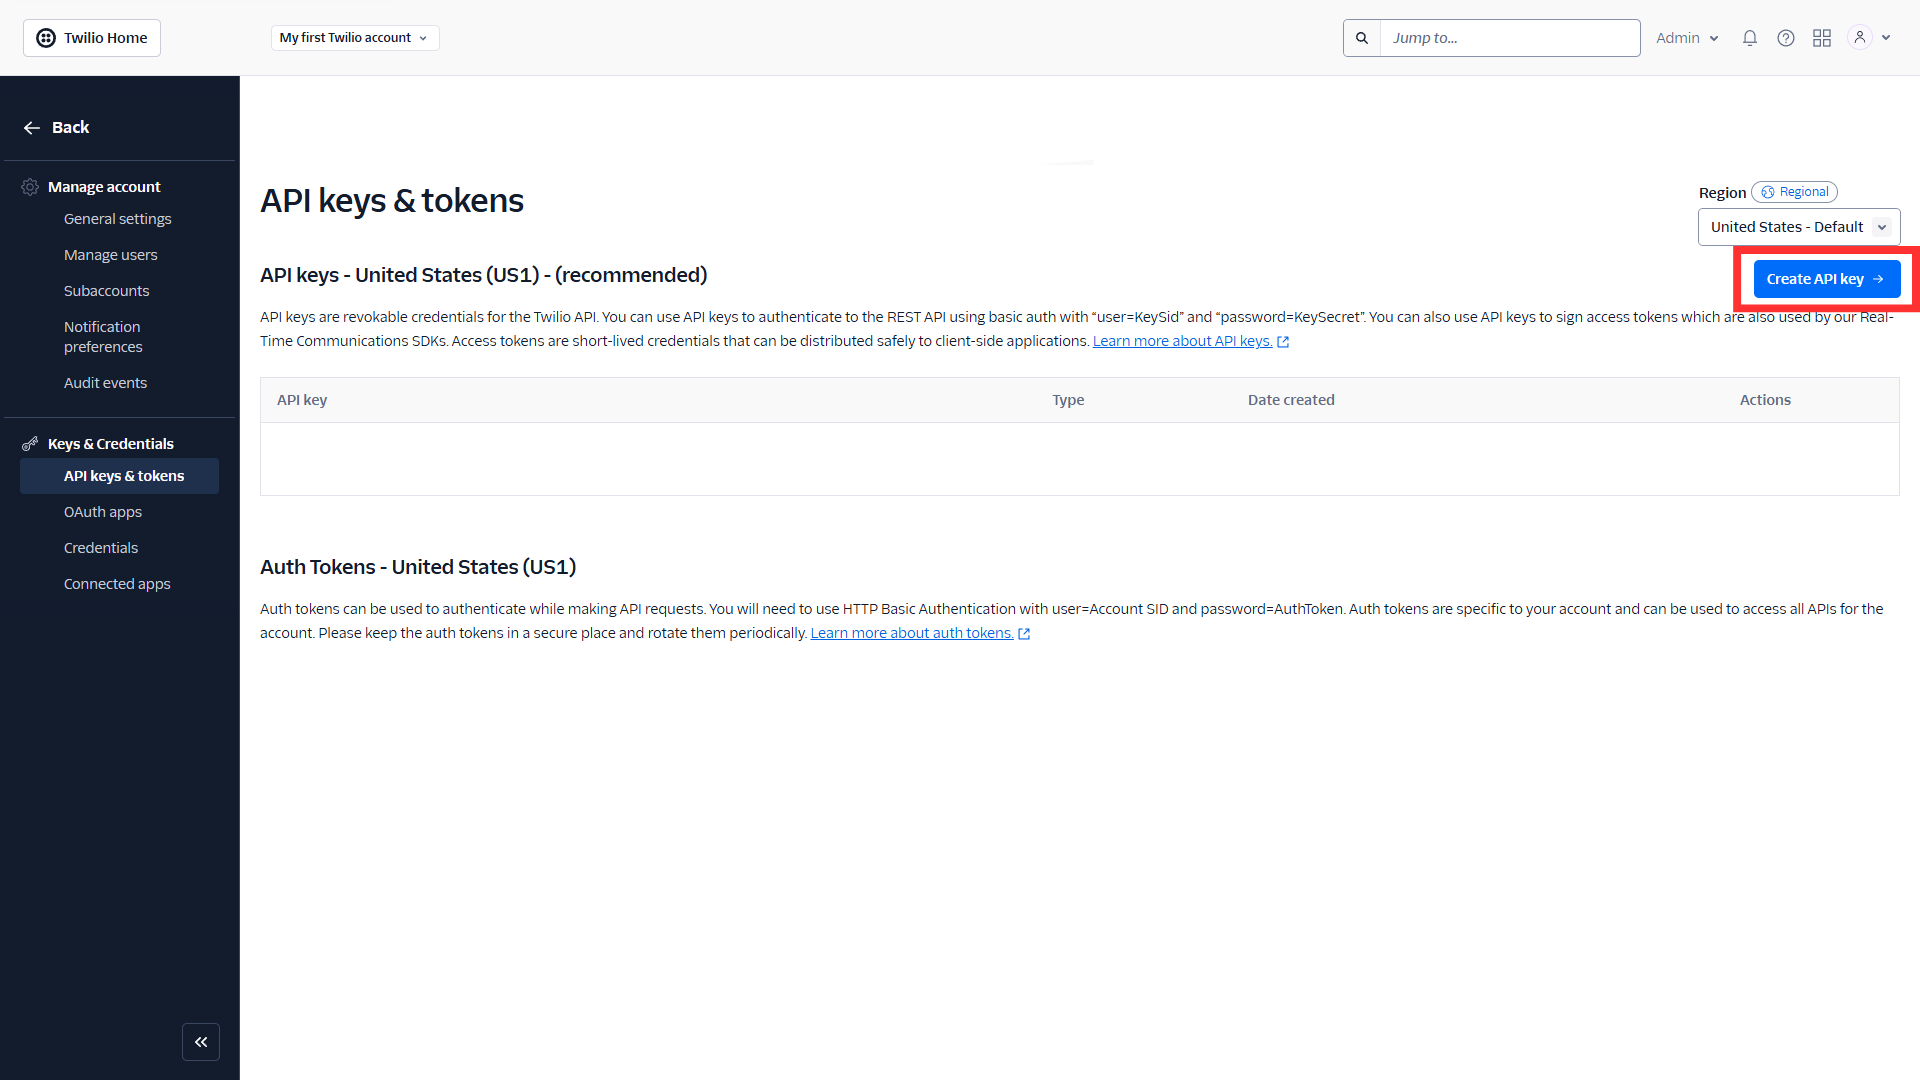
Lastly, head over to Twilio API Keys & Tokens from your Twilio account dashboard. Cick on Create API Key to create your credentials.
4. Setup Twilio API keys & tokens
Give it a name, it's recommended that the region should be set to your region, and the key type should be Standard.

Give it a name, it's recommended that the region should be set to your region, and the key type should be Standard.
5. Enter Keys Into The Plugin
After creating these API keys, copy both the SID and SECRET key and enter them into the DialBunny settings page into the correct fields.
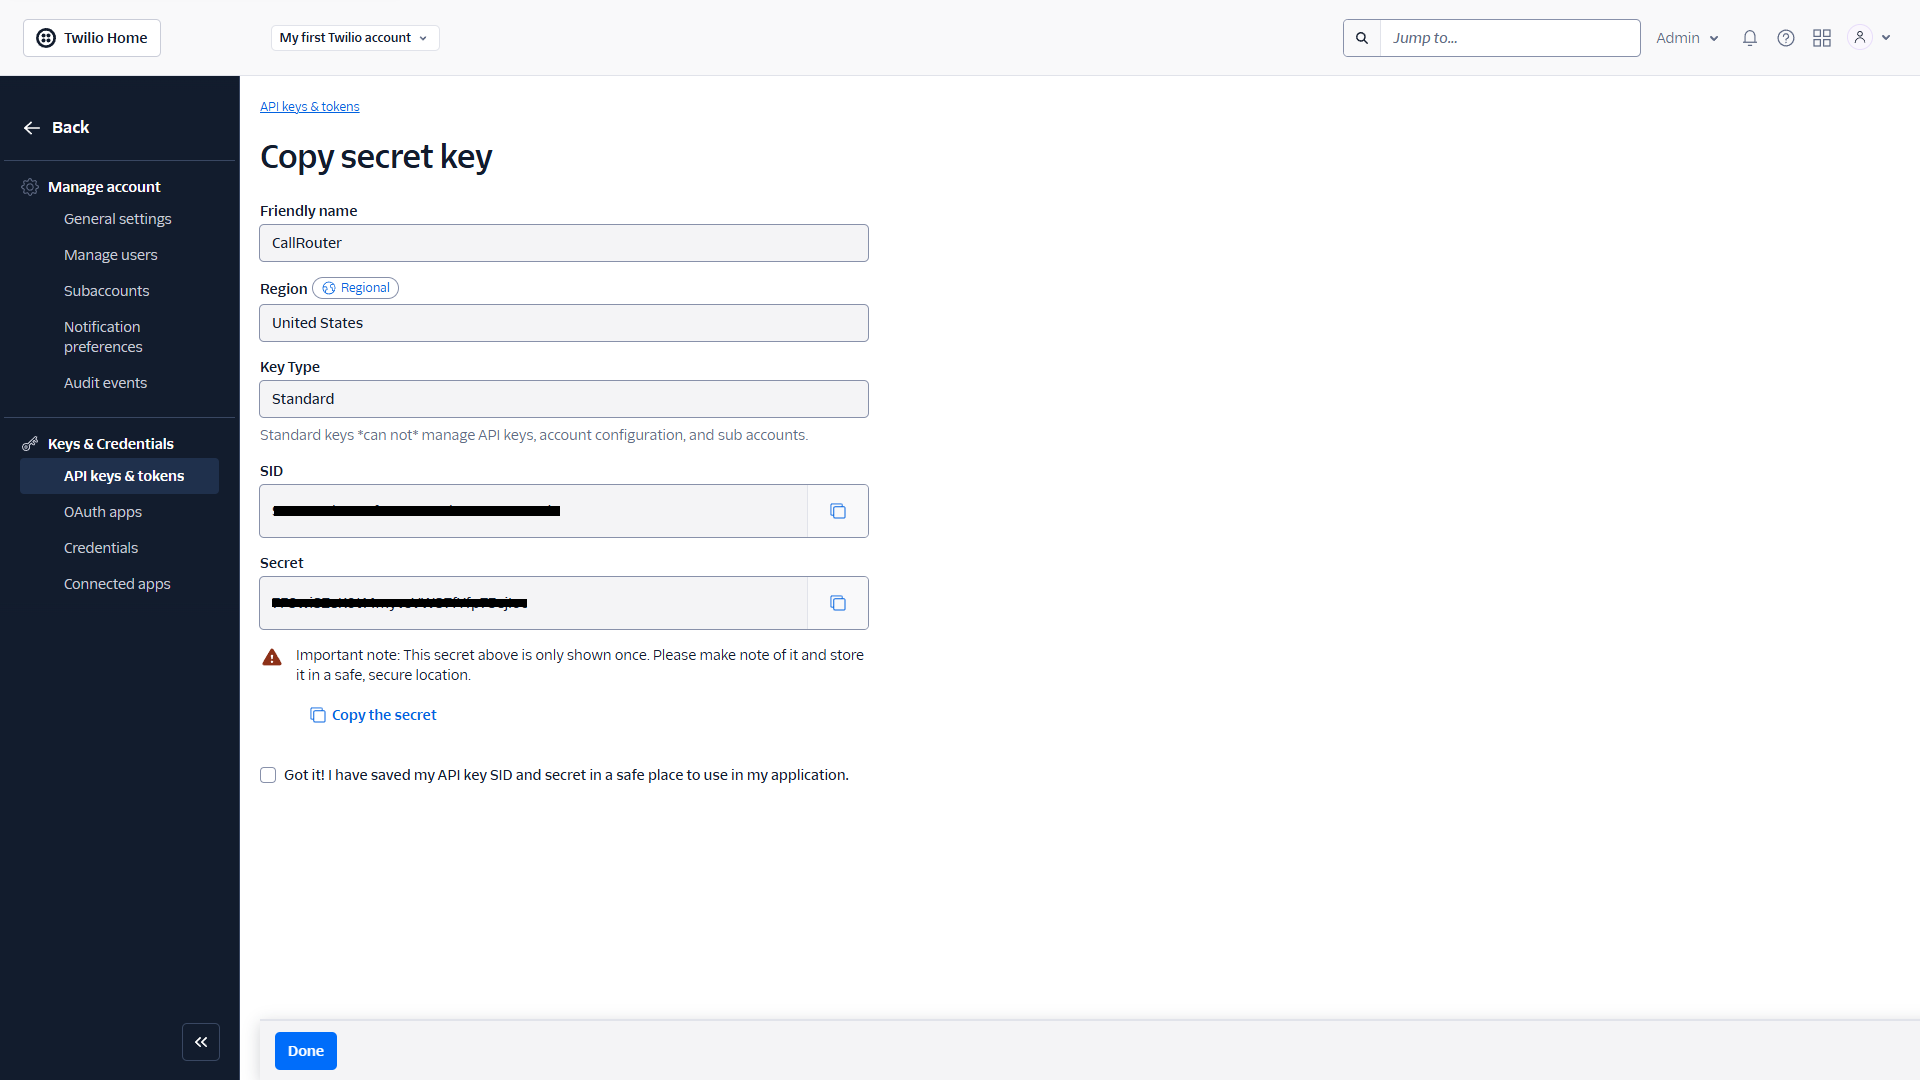
After creating these API keys, copy both the SID and SECRET key and enter them into the DialBunny settings page into the correct fields.