Vapi Voice Assistant Setup Guide
This documentation page will walk you through the steps to create and configure your own AI Vapi voice assistant that can answer phone calls on your behalf. Whether you're setting it up to handle calls when you're busy or to provide 24/7 automated support, this guide will help you get everything running smoothly. Follow along to connect your Vapi account, customize your assistant's behavior, and start managing calls with smart, responsive automation.
Requirements
Before starting this guide ensure that you have an active Twilio and Vapi account and already have the DialBunny plugin installed on your WordPress site.
Plugin Already Installed: You will also need to have already installed and activated the DialBunny plugin onto your WordPress site. It is also recommended that your WordPress site has a proper domain and is secured with https.
Twilio Setup Complete: In order to follow this guide you will need to first complete the Twilio Setup to ensure all Twilio API keys are properly configured.
Active Phone Number: In order to follow this guide you will need to first have an active phone number in use and setup.
Vapi Account: In order to follow this guide you will need to first have an active Vapi account
How Does It Work?
The AI voice assistant you create is hosted directly on Vapi, using their powerful Voice and AI infrastructure to manage and respond to phone calls in real time. Vapi handles the voice processing, media streaming, and AI interaction, ensuring high performance, reliability, and low-latency responses. This allows your assistant to provide a seamless conversational experience to your callers, whether it's answering common questions, taking messages, or routing calls based on custom logic.
Create & Connect Vapi AI Assistant To DialBunny
Follow the steps below to create and connect your Vapi AI voice assistant to your phone number.
1. Start By Creating The Assistant From Vapi
Go to the Phone Numbers page from your Vapi account and click on "Create Phone Number". From the list of options click on "Free Vapi SIP".
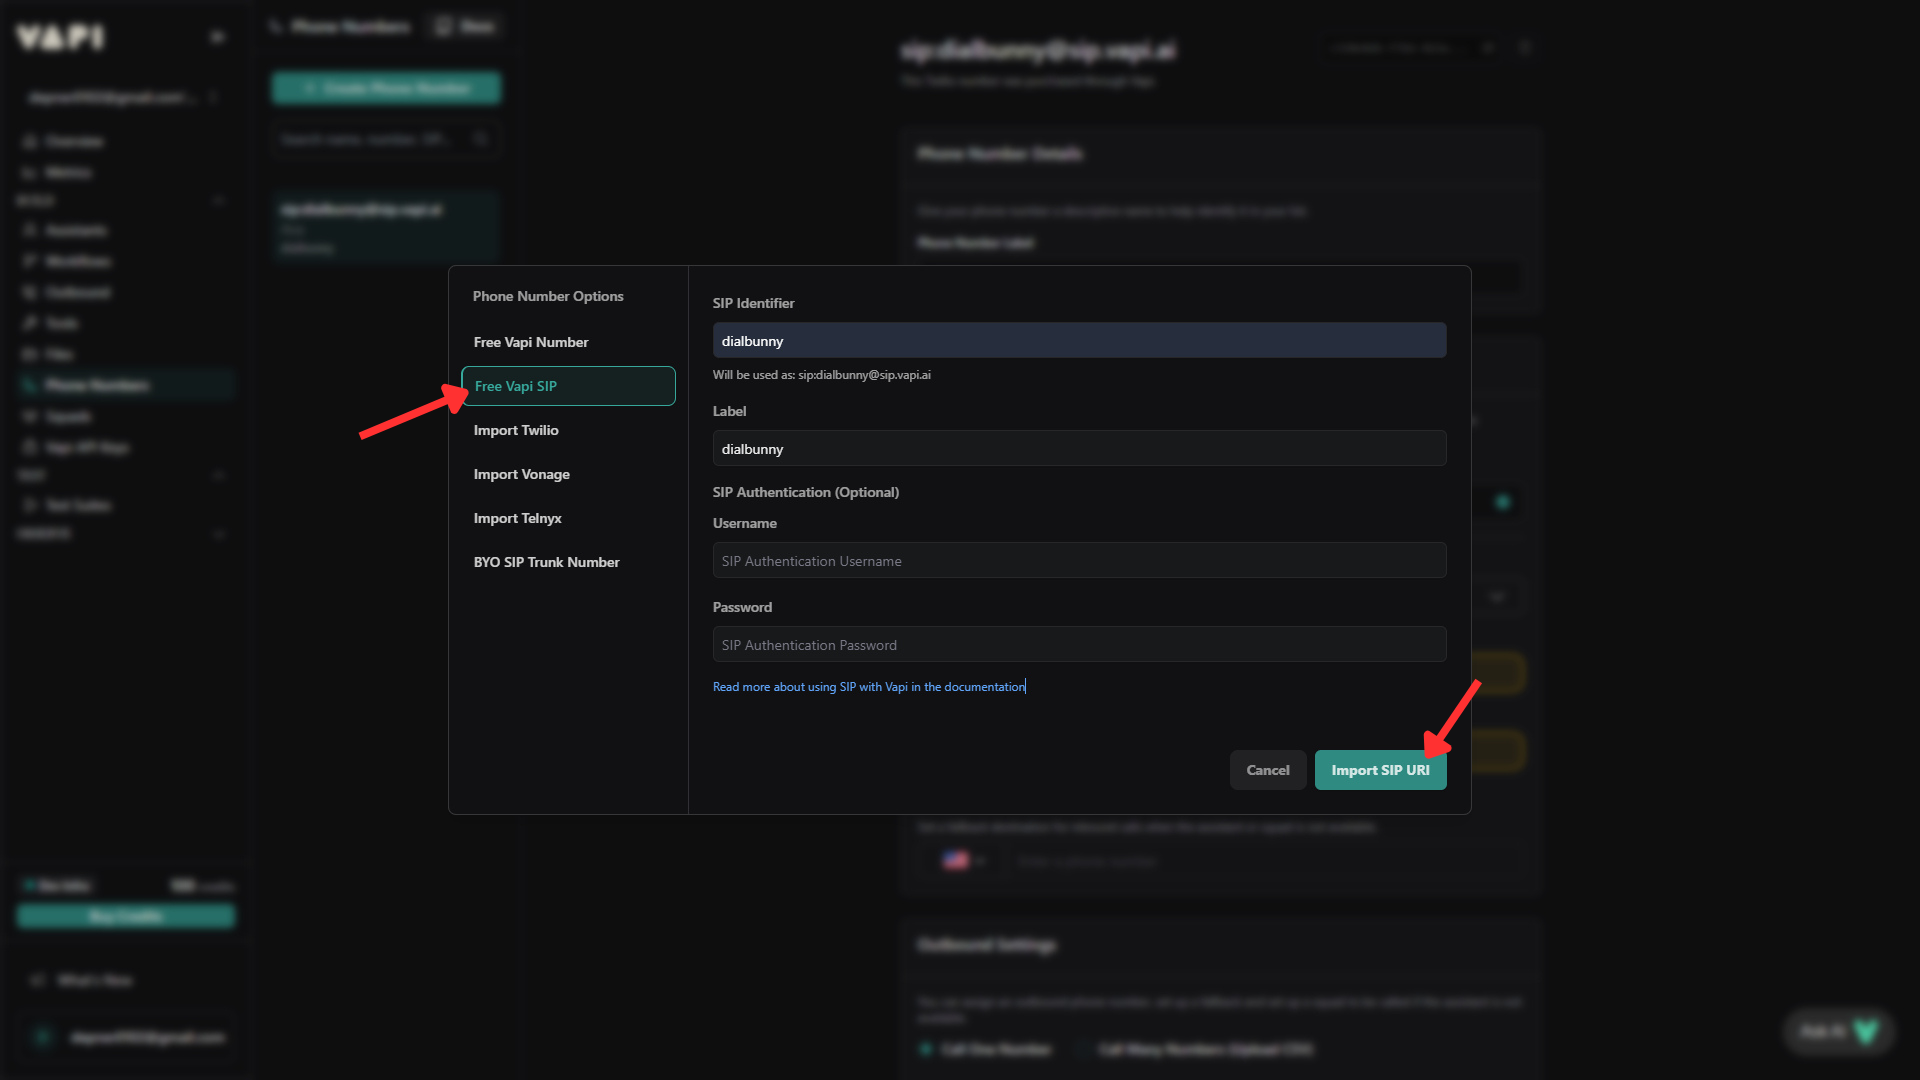
Go to the Phone Numbers page from your Vapi account and click on "Create Phone Number". From the list of options click on "Free Vapi SIP".
2. Add The Sip Url To The DialBunny Plugin
Go to the DialBunny plugin dashboard hosted in your WordPress site, navigate to the "AI Assistant" page and add in the SIP Url.
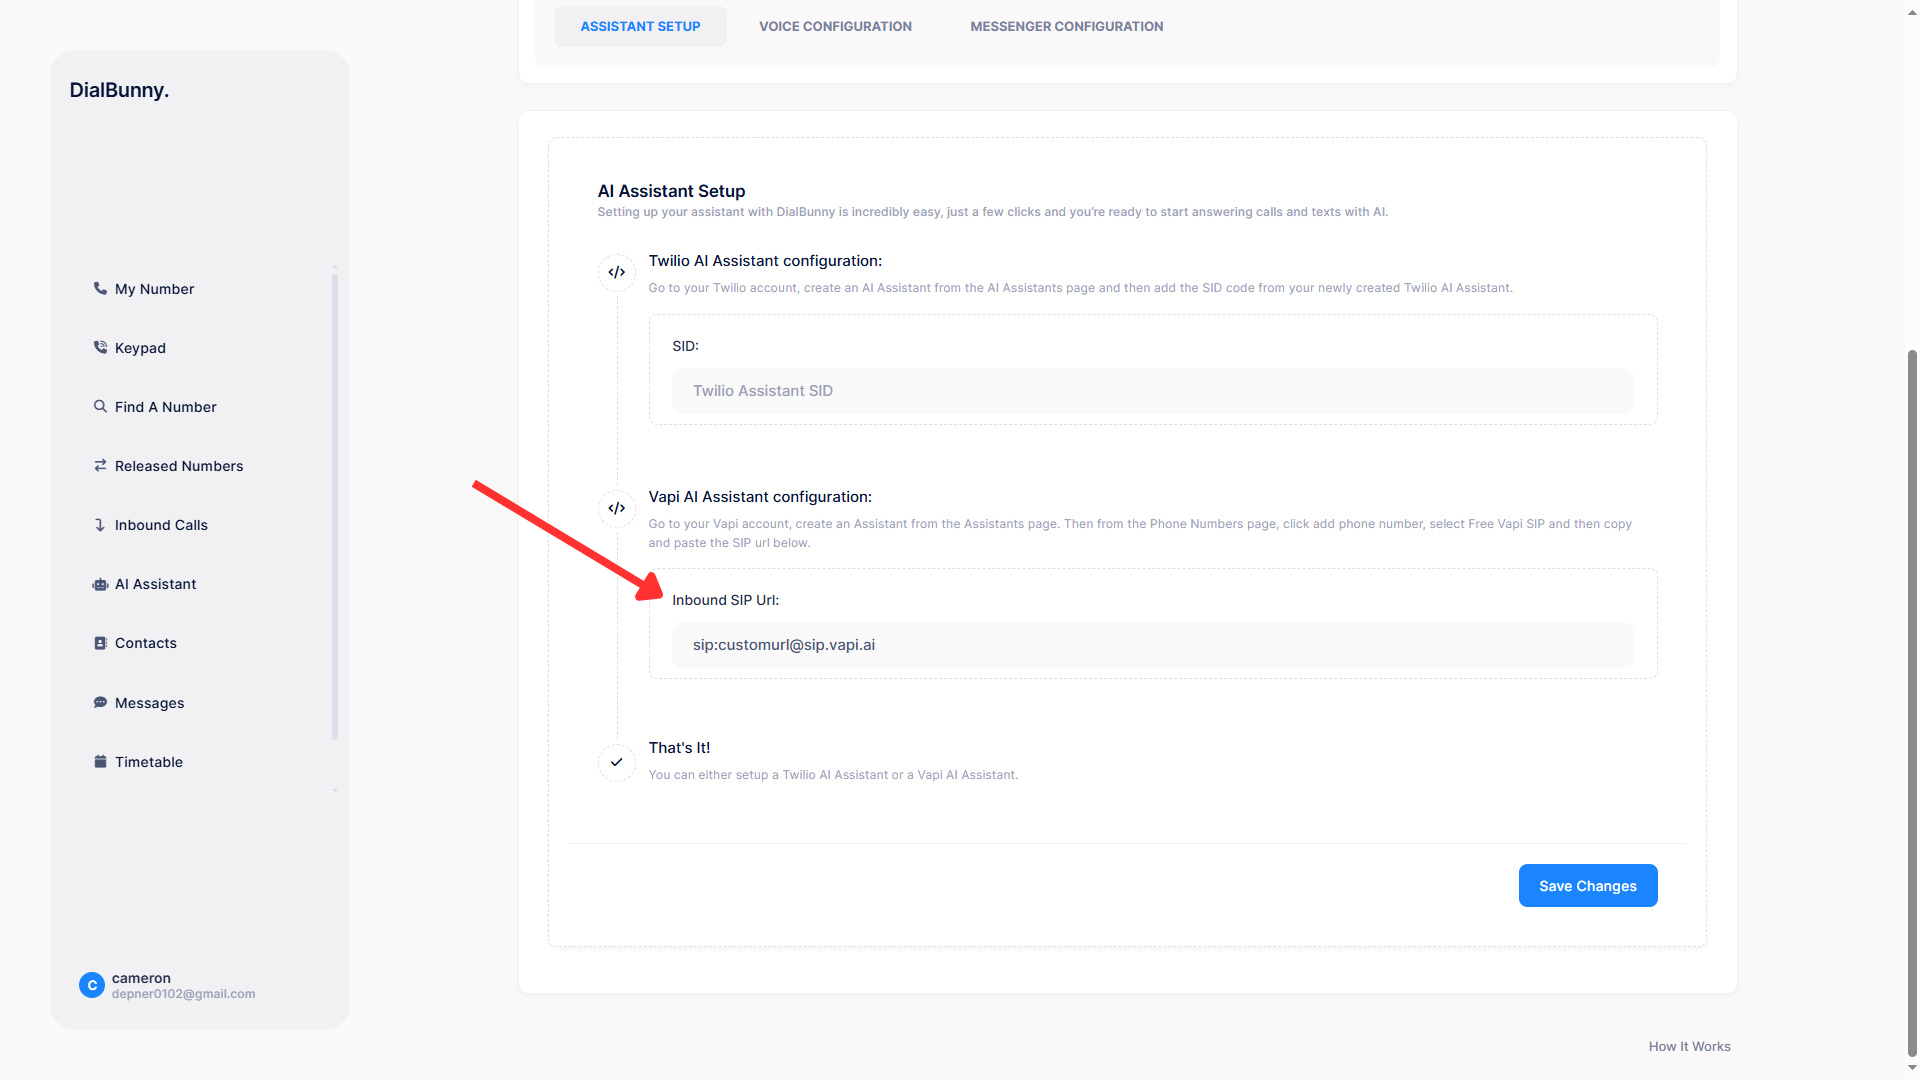
Go to the DialBunny plugin dashboard hosted in your WordPress site, navigate to the "AI Assistant" page and add in the SIP Url.